How to Choose Under-Appliance Cleaning Tools for Kitchens
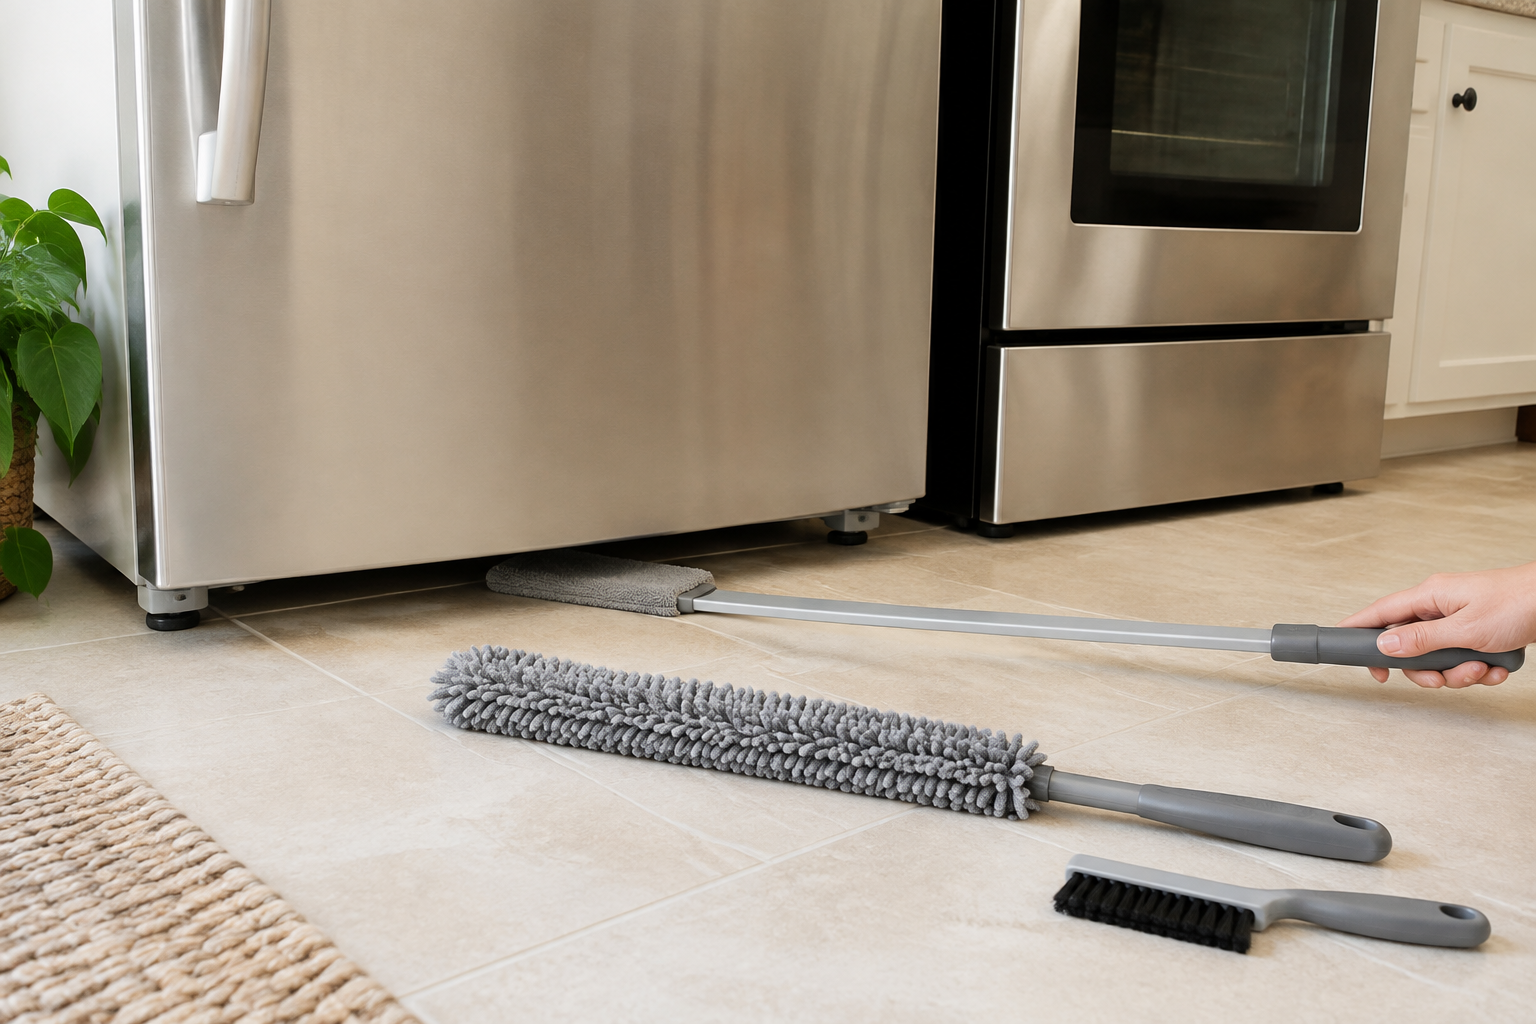
The best tool for cleaning beneath a kitchen appliance is thin enough for the lowest opening, long enough for the full reachable route, and suited to the debris. A flat washable microfiber wand handles ordinary dry dust; a narrow brush or compatible vacuum crevice tool gives more control for crumbs near the accessible edge.
As an Amazon Associate, The Good Home Doc may earn from qualifying purchases.
Quick decision before shopping
First measure the available space, identify the setup or surface constraints, and decide who will maintain the item. Skip the category if it blocks access, conflicts with the manufacturer's instructions or lease, or adds more upkeep than the problem justifies.
Start with measured clearance: These affiliate category links are shopping starting points, not tested brand rankings.
- Browse category: Washable under-appliance dustersFor broad, dry gaps with a straight, visible route.
- Browse category: Flexible appliance-gap wandsFor shallow obstructions when the maker permits access from the floor edge.
- Browse category: Long narrow crevice brushesFor controlled crumb pickup in short, reachable edge gaps.
Measure the complete covered head, usable reach, handle clearance, and narrowest opening. Check the tool's cover care and the appliance maker's cleaning and access instructions before use.
This guide covers ordinary, reachable dry dust and crumbs beneath intact appliances. It does not cover appliance interiors, electrical compartments, gas connections, pest residue, leaks, mold-like growth, broken glass, or unknown spills. Never remove a panel, defeat a guard, disconnect a utility, or move a heavy appliance merely to use one of these tools.
Measure the Appliance Gap and the Approach
Measure the lowest point at the front opening and the distance to the area you can safely reach. Feet, leveling hardware, trim, warming drawers, vents, hoses, cords, and floor transitions can interrupt a route even when the head fits at first. Check the manual for cleaning access, clearance, and ventilation restrictions.
Use a flashlight from the room side before inserting anything. If you cannot identify an object or residue, leave it alone. Let a recently used cooking appliance cool, and follow its maker's instructions rather than relying on a general waiting time.
Quick Picks by Debris and Gap
- Broad, dry dust beneath a refrigerator: a flat microfiber head with a securely attached washable sleeve.
- A shallow obstruction in a visible route: a controlled flexible wand with no exposed wire or hard corner.
- Crumbs close to the front edge: a narrow brush and dustpan, or a compatible vacuum crevice attachment.
- Greasy residue or an unknown spill: skip the dry duster and follow appliance and flooring care guidance.
- No safe floor-level opening: do not force a tool through a vent, grille, panel, or utility space.
Compare the Main Tool Formats
Flat Microfiber Wands
A broad, low-profile head can collect dry dust over a wide area. Choose one when the route is straight and the entire covered head clears it. Look for a cover that stays attached while withdrawing the tool. Avoid exposed frame edges, loose sleeves, and handles too short for the appliance depth.
Flexible Gap Dusters
A bendable head can follow a gentle route around a shallow obstruction. The advantage is access, not force: sharp bends can expose the core or make the head snag. Choose a design that holds a controlled shape and remains fully covered.
Long Crevice Brushes
A narrow brush is useful for visible crumbs near an appliance toe area or side edge. Check bristle stiffness against the floor finish and surrounding trim. A brush that only pushes debris farther underneath is the wrong shape for the job.
Vacuum Crevice Attachments
A compatible vacuum attachment removes loose debris instead of relocating it. Confirm the connection, nozzle thickness, hose reach, and appliance clearance. Keep hard nozzle edges off delicate floors, and do not use a household vacuum for wet, hot, sharp, or unknown material.
Must-Have Features
- Verified working profile: compare the thickest point of the covered head with the lowest measured clearance.
- Enough usable reach: the handle should reach the target without your hand entering the gap.
- Fully covered edges: hard corners, fasteners, and wire should not touch flooring or appliance finishes.
- Secure, cleanable contact material: removable covers should have clear wash and drying instructions.
- Controlled withdrawal: the tool should come back out without leaving a sleeve or attachment behind.
Nice-to-Have Features
- Replaceable sleeves in a documented size.
- A hanging loop or compact stored length.
- A light-colored cover that makes collected debris visible.
- A handle joint that locks instead of twisting loose in the gap.
A Safer Cleaning Routine
- Read the appliance cleaning guidance and let hot surfaces cool as directed.
- Inspect the route with a flashlight; stop for liquid, damage, wires, hoses, sharp objects, or unidentified material.
- Measure opening height, reachable depth, and the open floor needed behind the handle.
- Start with a clean, dry tool and make one short test pass.
- Pull debris toward the room instead of pushing it deeper.
- Clean the tool as directed and let washable parts dry completely before storage.
Who Should Skip These Tools
Skip a dedicated wand if a current vacuum attachment or cloth reaches the visible edge comfortably. Skip flexible tools where the route contains a fan, moving part, cord, hose, sharp edge, or obstruction you cannot clearly identify.
Stop and use the appliance maker's service path, landlord maintenance, or a qualified professional when access requires moving or tilting a heavy appliance, disconnecting electricity, gas, water, or a vent, removing a panel, or working around a leak, damaged connection, burning smell, pest residue, or mold-like growth.
Related Countertop Access
If the cleaning problem is behind a small countertop appliance rather than beneath a refrigerator or range, do not reach around a plugged-in machine. Follow its shutdown and cooling instructions, then decide whether a measured appliance sliding tray would provide a controlled access path without compromising feet, cord slack, counter compatibility, or operating clearances. If routine reheating residue is the problem, first decide whether a microwave splatter cover fits the dishes, appliance clearance, cleaning routine, and storage space.
Prevent Crumbs Beside a Freestanding Range
If the counter-to-range seam is straight and the appliance instructions allow it, a removable silicone stove gap cover may reduce what falls below. Measure first and keep every burner, control, vent, and required clearance unobstructed; a cover is not a reason to move or disconnect an appliance.
Bottom Line
For an ordinary straight gap with dry dust, choose a fully covered microfiber wand whose measured profile and reach fit the appliance. Use a narrow brush or compatible vacuum attachment for controlled crumb pickup near the edge, and reserve flexible heads for visible routes with gentle obstructions. Appliance instructions and safe access matter more than a large attachment bundle.
Next step: Put this decision in context with the home-product buying framework guide.