How to Choose Appliance Sliding Trays for Deep Kitchen Counters
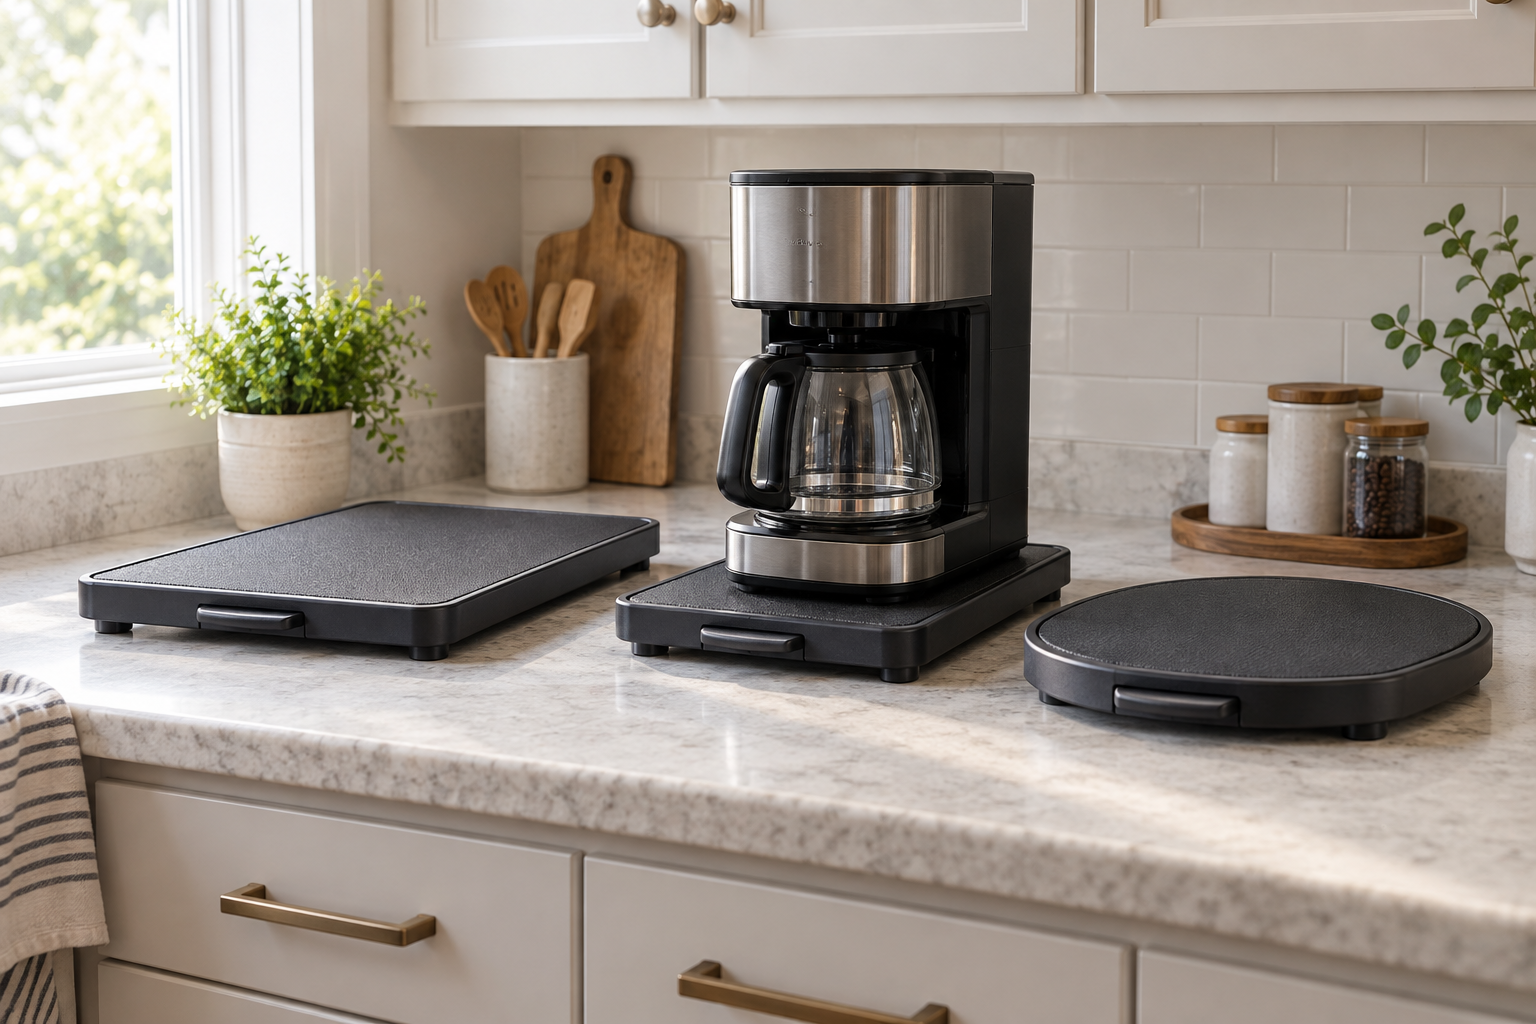
An appliance sliding tray is useful when a permitted countertop appliance has a stable storage spot beneath upper cabinets but must move forward for filling, access, or operation. The best fit supports the entire appliance footprint, travels only as far as needed, stays controlled on the actual counter, and leaves enough cord slack and working clearance.
As an Amazon Associate, The Good Home Doc may earn from qualifying purchases.
Quick decision before shopping
First measure the available space, identify the setup or surface constraints, and decide who will maintain the item. Skip the category if it blocks access, conflicts with the manufacturer's instructions or lease, or adds more upkeep than the problem justifies.
Compare the tray format that fits the appliance and counter:
- Browse category: Compare rectangular appliance sliding traysMatch the usable platform to every appliance foot, then verify the stated load, extension, handle, and counter compatibility.
- Browse category: Compare coffee-maker sliding traysCheck reservoir and basket access, cord slack, full working clearance, cleaning, and the coffee maker's placement instructions.
- Browse category: Compare rolling appliance slidersLook for controlled travel, stable stops, full footprint support, surface-safe contact points, and a reachable pull point.
These are category searches, not tested rankings. Confirm current dimensions, intended appliance use, stated load and its basis, materials, counter compatibility, movement instructions, care, warranty, and return terms. A tray never overrides the appliance maker's ventilation, heat, steam, water, electrical, or placement requirements.
This guide covers manual trays and low-profile rolling platforms for small countertop appliances. It does not cover furniture dollies, built-in pullout shelves, moving large appliances, or modifying cabinets. Model instructions remain the final authority.
Quick Best-Fit Guide
- Rectangular fixed-path tray: a straightforward fit when the appliance has a rectangular footprint and only needs short forward-and-back travel.
- Rolling platform with a front pull: useful when controlled movement on a compatible smooth counter matters, provided stops or the documented mechanism prevent unwanted travel.
- Turntable or rotating platform: consider only when side access is the problem and the complete swept circle stays clear; it is not a substitute for forward operating clearance.
- No tray: better when the appliance already moves easily, the feet do not fit fully, the counter is uneven or incompatible, or the correct operating location is elsewhere.
Measure the Appliance Footprint, Not Just Its Body
Measure the outside position of every foot or support point. All feet should land fully on the tray's usable flat area, away from a raised rim, handle recess, hinge, roller opening, or sloped edge. Record the appliance width and depth as well, because knobs, doors, baskets, handles, reservoirs, and cords may project beyond the feet.
Compare the measured footprint with the maker's usable-platform dimensions rather than the tray's maximum outside size. A tray that is wider than the appliance can still be too shallow for the rear feet. Do not improvise with overhanging feet or stack boards, mats, or a second slider to enlarge the surface.
Map Storage and Operating Positions
Mark the stored position and the farthest permitted working position with removable tape. In both positions, check upper cabinets, backsplash, counter edge, sink splash, wall outlets, nearby burners, doors, drawers, and the path of the appliance lid or reservoir. The tray should remain fully supported by the counter throughout its documented travel.
Some coffee makers, multicookers, toasters, kettles, and similar appliances have specific clearance, ventilation, steam, heat, water, or surface requirements. If the maker directs you to move the appliance away from cabinetry or other surfaces before use, measure that final location—not merely the position where a lid opens. Never operate an appliance beneath cabinets just because a tray makes it easier to pull forward.
Compare Movement Mechanisms
Sliding-Surface Trays
These use a low-friction base or nested surfaces that travel along a defined path. They can feel controlled, but crumbs or grit beneath them may mark a counter and spills can enter the mechanism.
Best for: short, straight travel on a surface the maker lists as compatible.
Check: how travel starts and stops, whether the base stays planted, how the mechanism is cleaned, and whether the handle remains accessible.
Small-Roller Platforms
Rollers can reduce push effort, but they also make control, stopping, and level counter contact important. Confirm whether the rollers retract, lock, or rely on a handle-operated lift according to the instructions.
Best for: an appliance and counter combination explicitly within the platform's stated use and load.
Check: unwanted sideways movement, roller marks, the stopping method, edge clearance, and whether all support points remain engaged.
Rotating Platforms
A turntable can expose a rear water tank or side control without straight travel. Its rotating footprint is larger than its resting footprint, and a cord can wind or pull as the platform turns.
Best for: occasional side or rear access with a completely clear rotation path.
Check: full swept clearance, centered weight, rotation stops, cord behavior, and whether rotation conflicts with the appliance instructions.
Stated Load Is Only One Check
A listed capacity does not prove the tray fits every appliance below that number. Confirm what the stated load means, whether it assumes even distribution, and whether the maker names compatible appliance categories. A tall appliance with a small base can remain awkward even when its weight is within the number.
Keep the appliance centered as directed and pull from the tray's intended handle rather than the appliance body. Stop using the setup if the platform bows, rocks, skews, rolls unexpectedly, sheds material, or no longer returns smoothly. Do not use a slider to move an appliance while it contains hot liquid unless both appliance and tray instructions explicitly allow that exact routine.
Counter Surface, Feet, and Cleaning
Check the tray maker's surface guidance for stone, laminate, sealed wood, tile, stainless steel, or another counter. Texture, grout lines, seams, moisture, and grit can change how feet or rollers behave. Test an unloaded tray in an inconspicuous area if the instructions permit, and keep its underside clean.
Choose removable or accessible surfaces that match the spills likely around the appliance. Unplug and cool the appliance as its instructions require before cleaning. Remove crumbs and grit rather than sliding over them, and dry the tray and counter completely before reassembly. Do not immerse a mechanism unless its care instructions explicitly permit it.
Cord Slack and Outlet Fit
Trace the cord through the entire movement path with the appliance unplugged. It should not stretch, snag on the backsplash, pass beneath a tray, cross a hot or wet area, or pull at the plug. Keep the cord out of rollers, hinges, feet, and the counter edge. Follow the appliance maker's outlet and extension-cord rules; a slider does not justify a new electrical arrangement.
If the cord is too short for the required operating position, relocate the appliance or have the setup assessed appropriately. Do not place the tray where movement loosens a receptacle, bends the plug sharply, or brings electrical connections close to the sink.
Must-Haves Before Nice-to-Haves
Must-Haves
- A usable platform that fully supports every appliance foot.
- A stated intended use and load arrangement matching the appliance.
- Enough controlled travel to reach the maker-approved operating or access position.
- Feet or a base documented for the actual counter surface.
- A cord route with slack through the complete movement path.
- Clear cleaning, inspection, and stopping instructions.
Nice-to-Haves
- A low front pull that is reachable without gripping the appliance.
- A removable top layer with specific care instructions.
- Clearly visible alignment or travel limits.
- A low profile that does not create a cabinet-clearance conflict.
Who Should Skip an Appliance Sliding Tray
- Anyone whose appliance feet do not sit fully on the usable platform.
- Households without a clear, fully supported path between storage and operation.
- Setups where the tray adds enough height to violate upper clearance or make filling awkward.
- Appliances with damaged feet, unstable bases, leaking tanks, damaged cords, or maker instructions that conflict with sliding-platform use.
- Counters that are sloped, cracked, uneven, cluttered, regularly wet, or excluded by the tray maker.
- Anyone expecting the tray to make a heavy appliance safe to lift, repair, tip, or relocate.
Buying Checklist
- Measure every appliance foot and the full outside appliance footprint.
- Measure the usable tray surface, total height, and documented travel.
- Mark stored and operating positions and check the complete clearance envelope.
- Confirm stated load, intended appliance use, weight distribution, and pull method.
- Trace cord slack and plug position through the full path.
- Verify counter compatibility, feet or rollers, cleaning, and inspection steps.
- Read both sets of instructions and confirm warranty and return terms before buying.
Bottom Line
A low-profile rectangular tray is the simplest choice when it fully supports the appliance, moves along a short clear path, and stays compatible with the counter. A roller platform can help with a heavier permitted setup when its stopping method is controlled; a turntable is more specialized for side or rear access. Skip every format if it cannot place the appliance in the maker-approved operating position with stable support, safe clearance, and relaxed cord routing.