How to Choose Potting Mats for Apartment Plant Care
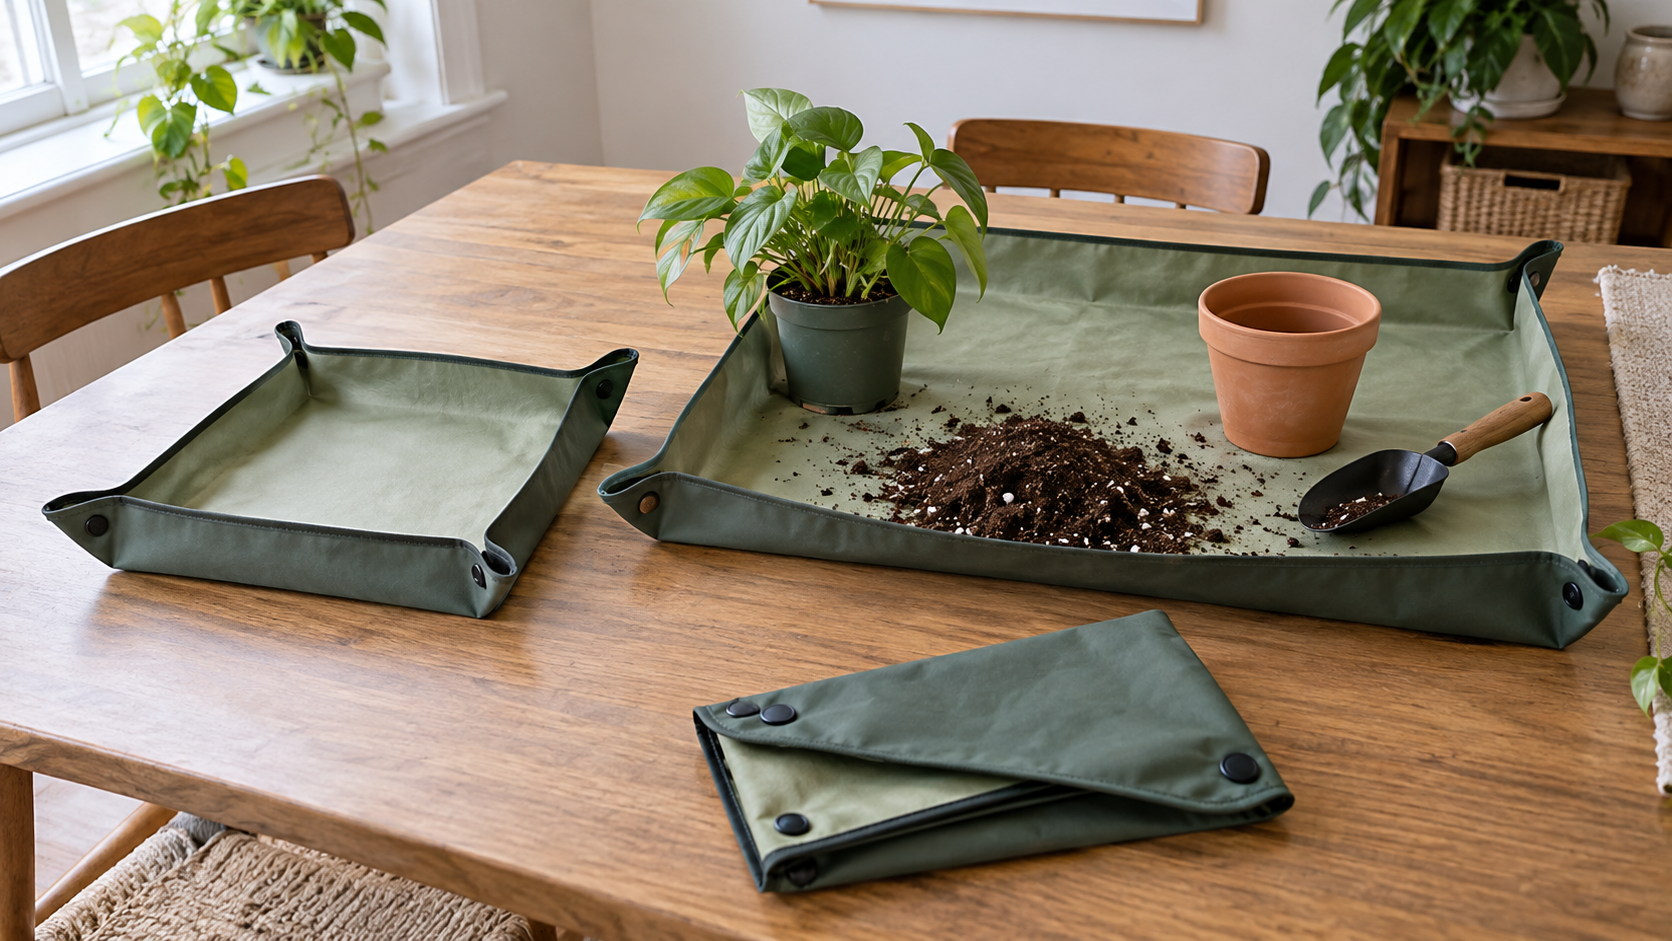
A potting mat can give loose mix and small spills a defined landing zone when an apartment has no potting bench. The best size is not automatically the largest: it leaves room for the plant, new pot, mix, and hand tools while still fitting the table, floor, balcony, sink, and storage route you actually use.
As an Amazon Associate, The Good Home Doc may earn from qualifying purchases.
Quick decision before shopping
First measure the available space, identify the setup or surface constraints, and decide who will maintain the item. Skip the category if it blocks access, conflicts with the manufacturer's instructions or lease, or adds more upkeep than the problem justifies.
Choose the work area before the material or color: These affiliate category searches are comparison starting points, not tested rankings.
- Browse category: Compare compact indoor potting matsCheck the open dimensions, usable area inside the raised edges, corner closure, folded size, and care directions.
- Browse category: Compare larger repotting matsMeasure the support surface and cleanup route first; more area also means a larger wet or dirty item to wash and dry.
- Browse category: Compare foldable raised-edge matsInspect how the corners fasten, whether seams or holes interrupt containment, and how the mat stays closed in storage.
Verify the exact product's dimensions, material, fasteners, cleaning and drying instructions, warnings, and return terms. “Waterproof” marketing does not prove that seams, snaps, or the entire setup will contain every spill.
Quick comparison
| Format | Best fit | Main tradeoff | Skip when |
|---|---|---|---|
| Compact square mat | Small houseplants, limited tables, and quick top-ups | Tools and the old pot can crowd the usable center | The plant's root ball or new pot approaches the inside edge |
| Large rectangular mat | Medium pots or a workflow that keeps supplies inside one zone | Needs more support, washing space, drying room, and storage | It overhangs the table or blocks a balcony or kitchen route |
| High-edge or tray-like mat | Loose, dry mix that tends to scatter during repotting | Raised sides can interfere with arms and make sweeping mix inward awkward | You need a rigid base or must contain meaningful liquid |
Measure the working zone, not just the flat mat
Product listings often emphasize the full open dimensions. The useful area is smaller once corners are snapped or folded into walls. Measure the plant at its widest point, the new pot, and the container of mix, then sketch where each will sit. Leave space for both hands without pushing a pot against the edge.
Also measure the support beneath the mat. A flexible mat that hangs over a tabletop edge can tip loose material back toward the floor. On a balcony, preserve the full door path and walking route, and keep mix, tools, and pots away from the railing edge. Building rules may limit where soil or plant debris can be handled or discarded.
What matters most
Corner construction
Snaps, hook-and-loop patches, ties, and folded tabs create the raised perimeter. Check how many corners must be assembled, whether the fasteners are reachable with dirty hands, and whether openings remain where fine mix can escape. A closure that is easy to undo over a waste or storage container makes cleanup simpler.
Material and seams
Look for a maker-identified material and specific cleaning directions. A wipeable sheet may release dry mix easily, but textured fabric, stitched seams, or exposed fasteners can hold particles. Treat broad resistance claims cautiously: punctures, worn coatings, seams, and corner openings can change performance.
Open and folded size
Compare all three states: flat for setup, assembled for use, and folded or rolled for storage. A mat that folds small only after careful flattening may be inconvenient if there is nowhere to clean and dry it first. Confirm whether the folded bundle needs a strap, pouch, or separate shelf.
Must-haves
- Enough usable interior area: Fit the plant, pot, mix, and normal hand movements inside the assembled edges.
- A fully supported base: Place the mat on a stable surface that can carry the plant and supplies without overhang or wobble.
- Clear care instructions: Know whether to wipe, rinse, hand-wash, or avoid particular cleaners.
- A realistic drying plan: The mat should dry fully before folding so damp material is not stored against itself.
- Manageable closures: Corners should assemble and release without forcing the fastener or scattering the contents.
Nice-to-haves
- Contrasting interior color: It can make pale roots, dark mix, and small dropped items easier to see.
- Storage strap or pouch: Useful when it stays attached or has a designated storage place.
- Rounded inside corners: May be easier to wipe than tight folds, depending on the actual construction.
- Two usable sizes: Worth considering only if both sizes match recurring jobs rather than becoming duplicate clutter.
Cleanup without turning the mat into another chore
Remove reusable potting mix or dispose of it according to the product guidance and local rules; do not wash loose mix down a sink or drain. Bring the corners together slowly, transfer dry debris to the intended container, and use a soft brush or cloth if the maker permits. Rinse only where the runoff can be managed appropriately.
Before folding, inspect seams and closures for trapped particles and let the entire mat dry. Keep plant debris separate when disease or pests are suspected, and use trustworthy horticultural guidance rather than assuming the mat or a household cleaner will prevent transfer between plants.
Know the protection limits
A flexible mat is a cleanup aid, not guaranteed floor or furniture protection. It may not contain a tipped watering can, a leaking pot, abrasive grit under the sheet, dye transfer, or moisture that escapes through a seam. Follow the table, counter, flooring, and mat makers' care instructions; use a compatible rigid tray when liquid containment or a firm base is the real need.
For heavy planters, damaged pots, unfamiliar plant irritants, or a setup you cannot move safely, skip the mat-first approach. Break the job into smaller containers, work in an appropriate outdoor or utility area, or get help rather than lifting over a flexible sheet.
Who should skip a potting mat?
Skip a compact mat if the assembled interior barely fits the pot. Skip a large mat if there is no supported work surface or place to wash, dry, and store it. Skip flexible mats altogether when you need rigid spill containment, when the surface beneath has strict moisture restrictions, or when the task involves a planter too heavy or awkward to control safely.
A shallow rigid tray, flattened recyclable packing paper for a dry minor task, or an approved outdoor work area may be simpler. The right choice is the setup that contains the actual mess without creating a harder cleanup route.
A five-minute buying check
- Measure the support surface and the mat's usable area after the corners are raised.
- Set the current and new pot side by side and allow room for both hands and the mix container.
- Check the exact material, seams, corner closures, cleaning directions, and surface-contact warnings.
- Plan where loose mix will go and where the mat can be cleaned and fully dried.
- Measure the folded bundle and give it a specific dry storage place.
Next step: If the bigger problem is carrying water through a narrow apartment or balcony route, use the balcony watering-can guide. For routine trimming, compare plant snips and compact hand pruners by stem fit and safe storage.
Choose the transfer tool too: A mat contains the work area, but it does not make an oversized tool fit a pot. If a trowel spills loose mix, compare narrow, wide, and compact soil scoops by the bag opening, pot opening, sidewalls, loaded grip, and cleanup routine.
Next step: Put this decision in context with the renter-friendly upgrades guide.