Household spare-battery storage
How to Choose Battery Organizer Cases for Household Spares
A useful battery organizer does more than make a drawer look tidy. It keeps the sizes you use visible, holds individual cells so their terminals do not contact loose metal objects, and fits a dry storage location that adults can reach without giving children casual access. Start with your real inventory, then choose the smallest case with clearly separated slots and a dependable closure.

As an Amazon Associate, The Good Home Doc may earn from qualifying purchases.
Compare battery-storage formats
- Browse category: Household battery organizer casesStart here for a portable lidded case with fitted slots for several common sizes.
- Browse category: Battery cases with tester storageCompare only after checking the tester's supported chemistries, sizes, and instructions.
- Browse category: Wall-mount battery organizersConsider when the mounting location, fasteners, wall, access, and household rules are suitable.
These category searches are shopping starting points, not tested rankings. Confirm supported sizes and chemistries, slot orientation, complete dimensions, latch and handle design, mounting instructions, tester documentation, storage conditions, warranty, and return terms for the exact product.
Quick Answer: Match the Case to the Batteries You Keep
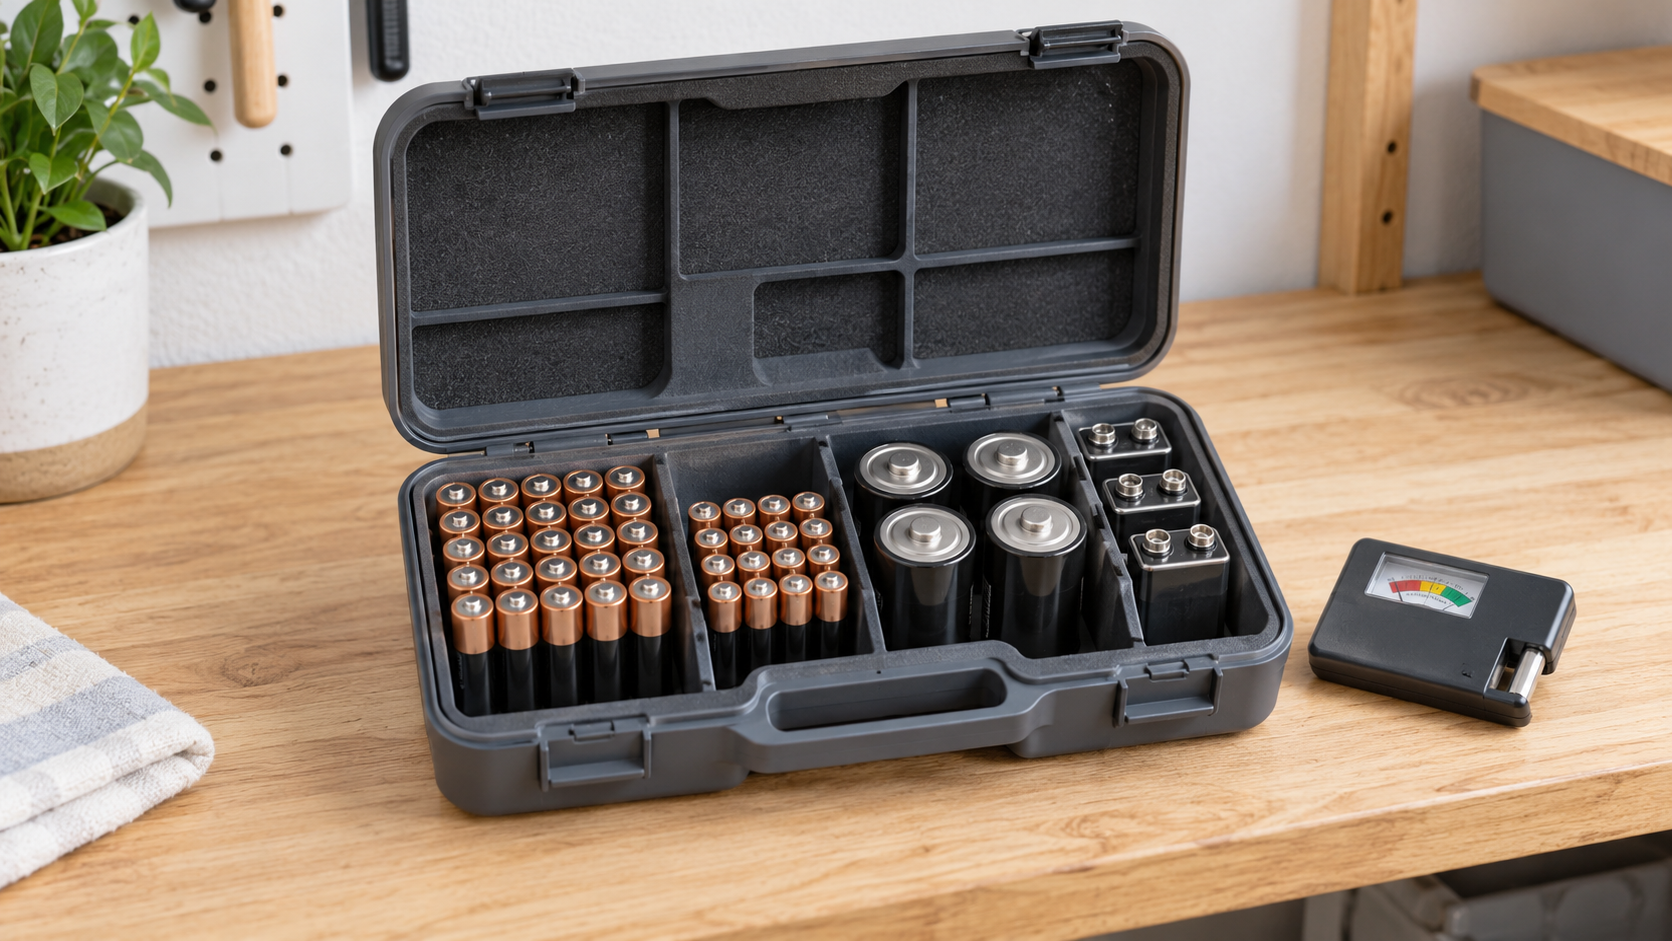
For many households, a portable hard case with fitted AA and AAA slots, a smaller number of C, D, and 9-volt positions, and a positive latch is a practical baseline. A clear lid helps with inventory. A handle helps only when it does not weaken the closure or encourage the case to be carried by children.
Do not buy the largest model automatically. Empty specialty slots waste space, while an undersized case sends overflow back into a loose drawer. Count unopened and opened spares by size, remove questionable cells from the comparison, and leave modest room for the quantities you routinely replace.
Choose the Right Format
Portable Lidded Cases
These keep the supply together and can move from a cabinet to a work surface. Compare closed dimensions, hinge, latch, handle, slot retention, and whether cells stay seated when the case is carried in the permitted orientation.
Best fit: one contained inventory in a dry cabinet or high shelf. Watch for: a lid that presses on terminals, loose slots, awkward double-sided loading, or a latch that opens when lifted.
Drawer Trays
An open tray makes everyday sizes easy to see without opening a case, but it leaves the contents more accessible. Measure every compartment and reserve the drawer for battery storage rather than mixing in keys, tools, coins, or other metal items.
Best fit: an adult-controlled dedicated drawer. Watch for: household access, drawer slamming, spills, humidity, and overflow around the tray.
Wall-Mount Organizers
A mounted unit saves shelf area but adds wall, fastener, load, and permission questions. Follow its mounting instructions and keep it away from heat, moisture, direct sun, and locations where a dropped cell is hard to retrieve.
Best fit: an appropriate utility area with a verified mounting surface and controlled access. Watch for: renter restrictions, unsupported fasteners, exposed cells, and locations children can reach by climbing.
Selection Criteria That Matter
- Supported sizes: compare named slot dimensions with the formats in your home; do not assume every “universal” case fits every cell.
- Individual retention: each battery should sit without forcing, crushing, or allowing terminals to bridge against loose conductive objects.
- Capacity by size: use a count for each size, not one advertised total dominated by AA slots.
- Closure: choose a latch you can verify and operate without flexing the case.
- Inventory visibility: a clear lid or readable layout reduces handling and reveals when a common size is running low.
- Storage fit: measure the closed case, handle, latch, hinge sweep, shelf depth, and removal path.
- Household access: an organizer is not automatically child-resistant. Place it for the people and visitors in the home.
What About an Included Battery Tester?
A tester can help sort uncertain cells only when its instructions cover the size and chemistry in question. Treat it as a separate tool, not proof that every battery in the case is usable. Read its instructions, observe polarity, and do not test a cell that is leaking, swollen, unusually hot, visibly damaged, or outside the battery maker's handling guidance.
A dedicated tester recess is useful when it prevents the tool from contacting battery terminals. If the tester is poorly documented or you rarely find mystery cells, a simpler organizer may be the better use of space.
Set Up the Organizer
- Read the battery and organizer instructions. Follow storage-temperature, moisture, orientation, and handling guidance for the exact battery type.
- Work on a dry, clear surface away from children, pets, food, liquids, flames, and metal clutter.
- Inspect each battery without squeezing or attempting a repair. Set aside damaged, leaking, swollen, corroded, recalled, or overheated batteries and follow manufacturer and local disposal guidance.
- Group cells by size and chemistry. Keep new and used batteries distinguishable; combine cells in a device only as its instructions permit.
- Load only intended slots and observe marked orientation. Never force a cell into a compartment or improvise with foil or loose hardware.
- Close and latch the organizer, then place it in the planned dry, moderate-temperature location with suitable access control.
An organizer cannot make every battery safe. It does not make damaged cells reusable and is not a fireproof charging or storage system. Rechargeable packs, button or coin cells, loose lithium cells, damaged batteries, and recalled products may need different handling; follow their manufacturers and applicable local collection programs.
Maintenance and Inventory
Check the case when replacing batteries or at a regular household interval. Look for damaged slots, a cracked hinge, weak latch, residue, corrosion, swelling, heat damage, or batteries that no longer sit properly. Stop using the organizer if it cannot keep cells separated and contained.
Clean only as the case maker directs, with all batteries removed, and let every part dry before reloading. Do not wash batteries. Keep date notes away from terminals, rotate stock according to manufacturer guidance, and take unwanted cells to an appropriate collection route.
Who Should Skip a Battery Organizer Case
- Skip a multi-size case if you keep one small battery format in original packaging and already have a suitable storage spot.
- Skip an open tray when children or pets can reach the drawer or metal objects share the space.
- Skip a wall-mounted model if the lease, wall, fasteners, or access location is uncertain.
- Skip any case that does not identify supported sizes, dimensions, loading method, or storage instructions.
- Skip included testers without clear instructions for the batteries you own.
- Skip this category as a solution for damaged, leaking, swollen, recalled, hot, or specialty batteries.
Bottom Line
The best battery organizer case is sized for your actual supply, holds each supported cell predictably, closes reliably, and fits a dry location with appropriate access control. Favor clear fit information and a simple layout over maximum advertised capacity. The case should make good storage habits easier, never justify keeping questionable batteries.